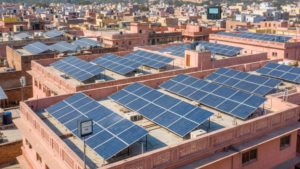
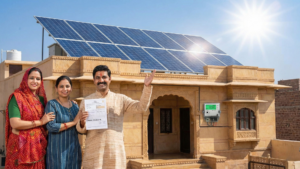
In the sun-drenched state of Rajasthan, switching to solar power isn’t just an environmental choice; it’s a financial masterstroke. To unlock these benefits and slash your electricity bills to zero, completing your Solar Rooftop Yojana Registration under the PM Surya Ghar: Muft Bijli Yojana is the essential first step for residents across Jaipur, Jodhpur, Ajmer, and beyond.
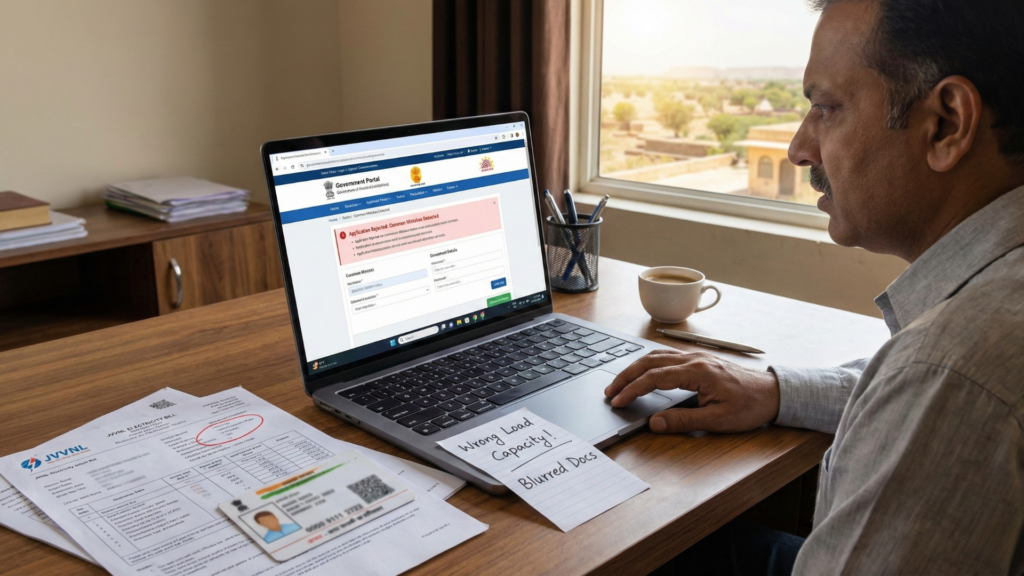
However, the bridge between high electricity bills and free solar power is paperwork. Many applicants face rejection simply because they miss a single document or upload a blurred image. To ensure your subsidy flows directly into your bank account without delay, understanding the Solar Rooftop Yojana Registration process is crucial.
This guide provides a detailed breakdown of every document you need, tailored specifically for Rajasthan’s DISCOMs (JVVNL, AVVNL, and JdVVNL), ensuring your application is approved on the first go.
Understanding the Importance of Accurate Solar Rooftop Yojana Registration
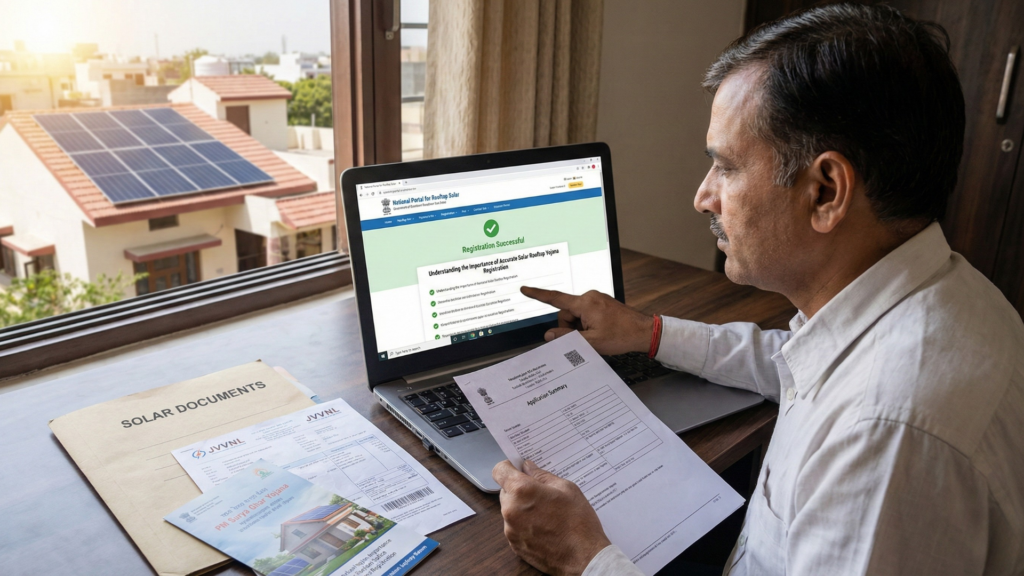
Before diving into the paperwork, it is essential to understand what the Solar Rooftop Yojana Registration entails for a resident of Rajasthan. The process has been simplified significantly with the launch of the National Portal for Rooftop Solar (pmsuryaghar.gov.in), but the accuracy of your data remains paramount.
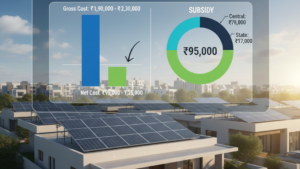
When you initiate your Solar Rooftop Yojana Registration, you are essentially applying for a Central Financial Assistance (CFA)—a subsidy that covers a significant portion of your installation cost. For Rajasthan specifically, this deal gets sweeter. If you are a beneficiary of the Mukhyamantri Nishulk Bijli Yojana (consuming more than 150 units), the state government often provides an additional top-up subsidy (up to ₹17,000*) to encourage you to switch to solar, reducing the burden on the state grid.
A successful registration ensures:
- Guaranteed Subsidy: Direct Benefit Transfer (DBT) to your bank account within 30 days of commissioning.
- Net Metering Approval: Speedier processing of your net meter by your local DISCOM (e.g., Jaipur Vidyut Vitran Nigam Ltd).
- Vendor Feasibility: Quick approval for vendors to commence installation.
Primary Documents Required for Solar Rooftop Yojana Registration
The documentation process is divided into two stages: Pre-Installation (what you need to apply) and Post-Installation (what you need to claim the money). Below is the comprehensive checklist for the first stage.
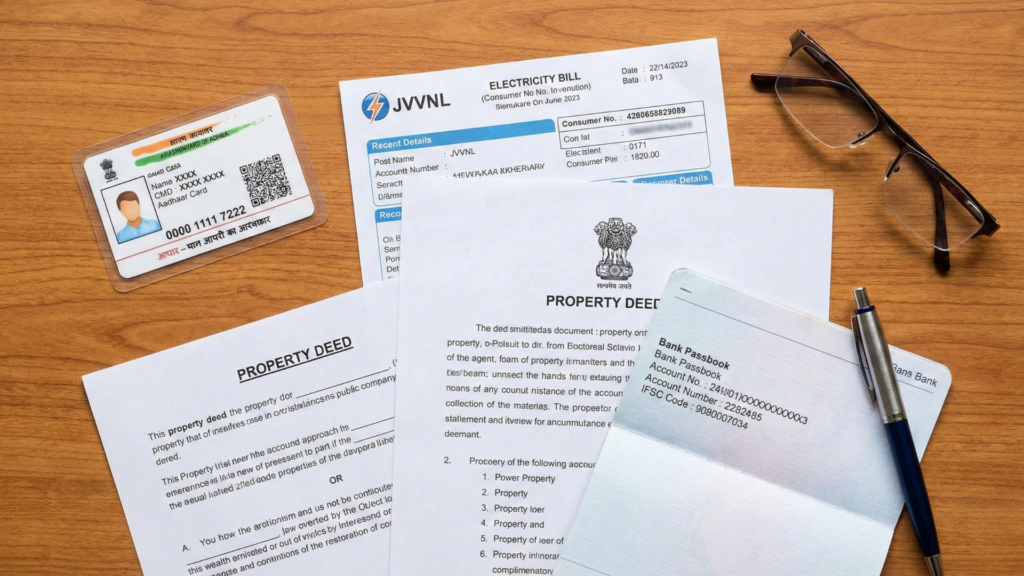
Identification and Property Proofs for Solar Rooftop Yojana Registration
To initiate your application on the National Portal, you must prove your identity and your ownership of the premises. The name on these documents must match the name on your electricity bill exactly.
Table 1: Identification & Property Document Checklist
| Document Category | Accepted Documents | Important Notes for Rajasthan Applicants |
| Identity Proof | • Aadhaar Card • PAN Card • Voter ID • Passport | Ensure your mobile number is linked to your Aadhaar for OTP verification on the National Portal. |
| Address Proof | • Aadhaar Card • Voter ID • Ration Card • Valid Passport | The address must match the installation site address mentioned in your electricity bill. |
| Electricity Bill | • Latest Electricity Bill (not older than 3 months) | Crucial: The bill must be from JVVNL, AVVNL, or JdVVNL. The Consumer Number (K-Number) must be clearly visible. |
| Roof Ownership | • Property Deed / Registry • Mutation Certificate (Jamabandi) • Property Tax Receipt | If the roof is shared (e.g., in flats), a No Objection Certificate (NOC) from the society or other owners is mandatory. |
| Passport Size Photo | • Recent Color Photograph | A clear, soft copy (JPEG format) under 200 KB is usually required for upload. |
Pro Tip: If the electricity connection is in the name of a deceased family member (e.g., a late father), you must first transfer the connection to your name via your local Assistant Engineer (AEN) office before starting the Solar Rooftop Yojana Registration.
Technical and Banking Documents for Subsidy Release
Once your application is approved and the feasibility report is sanctioned by your DISCOM (JVVNL/AVVNL/JdVVNL), you will proceed to installation. After installation, the second round of documentation begins. This is the most critical step for receiving your money.
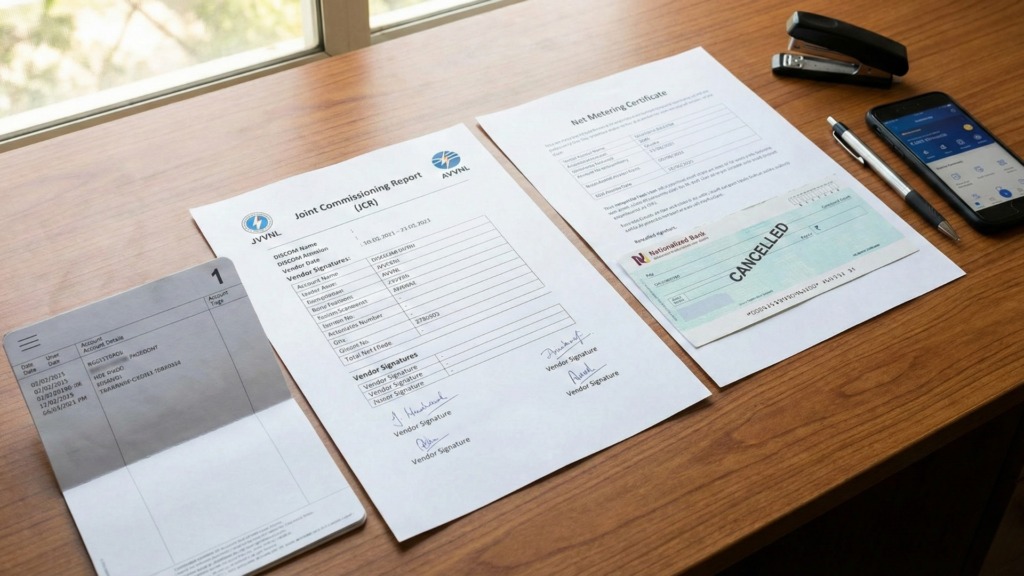
Banking & Commissioning Documents for Solar Rooftop Yojana Registration
The government sends the subsidy directly to your bank account. Therefore, a minor error in an IFSC code or account number can block your funds for months.
Table 2: Banking & Post-Installation Document Checklist
| Document Category | Specific Requirements | Why is it Needed? |
| Cancelled Cheque | Must clearly show: • Account Holder Name • Account Number • IFSC Code • Bank Branch Name | To verify your bank account for the Direct Benefit Transfer (DBT) of the subsidy. |
| Passbook Copy | Front page of the passbook (if a cheque is not available) showing the same details as above. | An alternative to the cancelled cheque to ensure funds go to the right person. |
| Net Metering Certificate | Issued by the DISCOM (JVVNL, AVVNL, JdVVNL) after they inspect your system and replace your meter. | Proof that your system is legally connected to the grid and counting export/import units. |
| Joint Commissioning Report (JCR) | A document signed by: 1. You (Beneficiary) 2. The Solar Vendor 3. DISCOM Official | This is the final “Green Signal” confirming the plant is safe, operational, and meets technical standards. |
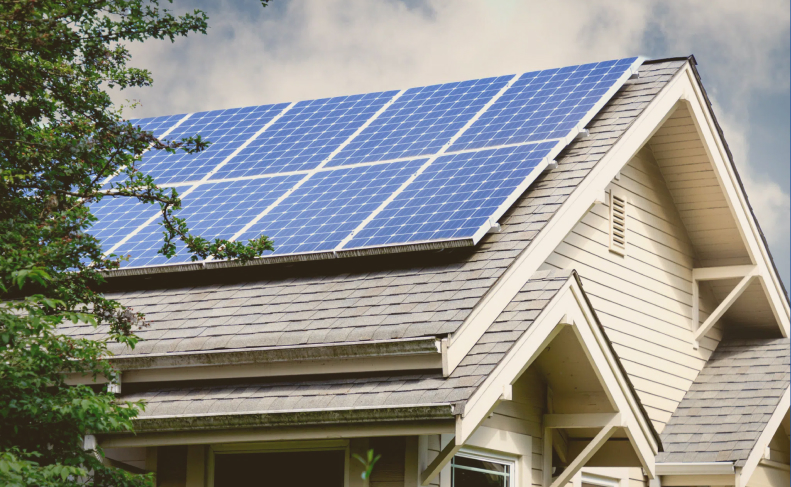
| Site Photographs | • Photo of the Solar Array (Panels) • Photo of the Inverter • Photo of the Earthing/Lightning Arrestor • Selfie with the Plant | Visual proof required by the Ministry of New and Renewable Energy (MNRE). |
Step-by-Step Guide for Solar Rooftop Yojana Registration in Rajasthan
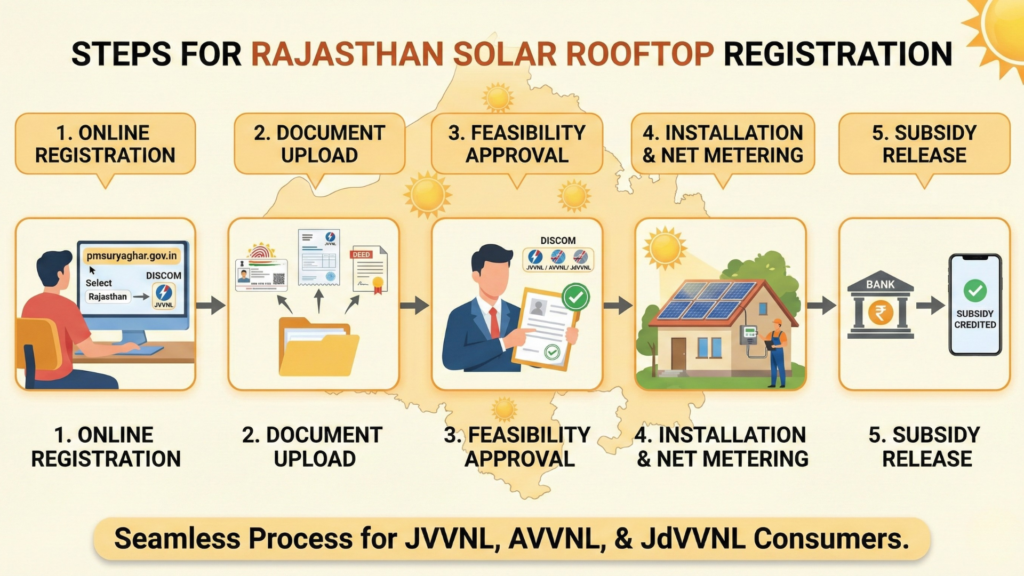
Now that you have your documents ready, here is how to navigate the registration process specifically for Rajasthan residents.
Step 1: Registration on the National Portal
Visit pmsuryaghar.gov.in. You will need to select your State as Rajasthan and your District.
- Select Your DISCOM: Be careful here. Choose Jaipur Vidyut Vitran Nigam Ltd (JVVNL), Ajmer Vidyut Vitran Nigam Ltd (AVVNL), or Jodhpur Vidyut Vitran Nigam Ltd (JdVVNL) based on who sends your bill.
- Enter Account Number: Enter your K-Number/Consumer Number exactly as it appears on the bill.
Step 2: Apply for Rooftop Solar
Once logged in, fill out the application form. This is where you upload the documents from Table 1.
- Tip: Ensure the “Sanctioned Load” you enter matches your electricity bill. You generally cannot apply for a solar capacity significantly higher than your sanctioned load without increasing your load first.
Step 3: Feasibility Approval
Your application goes to your local AEN (Assistant Engineer). They check if the local transformer has the technical capacity to handle your solar export. In Rajasthan, this approval is usually quick (3-7 days). Once approved, you will receive a notification.
Step 4: Installation via Empanelled Vendor
Do not install the system yourself. You must choose a vendor registered with the Rajasthan Renewable Energy Corporation Limited (RRECL) or the National Portal. They will handle the technical procurement.
Step 5: Net Metering and Commissioning
After installation, submit the installation details online. The DISCOM officials will visit your home to install the Net Meter (bi-directional meter). They will generate the Joint Commissioning Report (JCR) mentioned in Table 2.
Step 6: Subsidy Claim
Log in to the portal one last time. Upload your Cancelled Cheque and the JCR. The subsidy will be credited to your account within 30 days.
Common Mistakes to Avoid During Solar Rooftop Yojana Registration
Even with a checklist, applicants often make errors that lead to rejection. Avoid these common pitfalls to ensure a smooth Solar Rooftop Yojana Registration:
- Name Mismatch: If your bank account name is “Sandeep Kumar” and your electricity bill says “Sandeep K.”, the system might flag it. Try to ensure uniformity across Aadhaar, Bank, and Electricity Bill.
- Blurred Documents: When scanning your electricity bill or cancelled cheque, ensure the text is crisp. Phone photos taken in low light are a common reason for queries.
- Ignoring Load Capacity: Applying for a 5kW system when your home’s sanctioned load is only 2kW will lead to immediate rejection. You must apply for a load enhancement with your DISCOM first.
- Wrong DISCOM Selection: Rajasthan has three major DISCOMs. Selecting the wrong one (e.g., selecting JVVNL while living in Jodhpur) will route your application to the wrong office.
Conclusion
The transition to solar energy is one of the smartest investments a household in Rajasthan can make today. With the sun shining bright for over 300 days a year, your ROI (Return on Investment) is all but guaranteed. However, the gateway to these savings is the Solar Rooftop Yojana Registration.
By keeping this checklist handy and ensuring your documents—from your electricity bill to your cancelled cheque—are accurate and clear, you can breeze through the application process. Remember, the government wants to give you this subsidy to help India achieve its green energy goals. All you need to do is provide the right paper trail to claim it.
Start gathering your documents today, and turn your idle rooftop into a power-generating asset!
Frequently Asked Questions (FAQ)
Q1: Is the Solar Rooftop Yojana Registration free?
Ans: Yes, the registration on the official National Portal (pmsuryaghar.gov.in) is completely free. Do not pay any agent for the registration itself.
Q2: My electricity bill is in my father’s name. Can I do the Solar Rooftop Yojana Registration in my name?
Ans: No. The applicant’s name, the bank account name, and the electricity bill name must match. You must either transfer the electricity connection to your name or apply for the solar subsidy in your father’s name (using his bank account).
Q3: How much subsidy will I get in Rajasthan?
Ans: Under the PM Surya Ghar Yojana, you get:
- ₹30,000 for a 1kW system.
- ₹60,000 for a 2kW system.
- ₹78,000 for a 3kW system or higher.
- Note: Rajasthan residents consuming >150 units under the free electricity scheme may be eligible for an additional state top-up.
Q4: Can I use a saving account or do I need a current account for the subsidy?
Ans: For residential applications, a standard Savings Bank Account is perfectly fine. Ensure it is KYC-compliant and active.
Q5: How long does the Solar Rooftop Yojana Registration approval take in Rajasthan?
Ans: Technical feasibility approval usually takes 3 to 7 working days, depending on your local DISCOM office (JVVNL/AVVNL/JdVVNL). The entire process from registration to subsidy credit typically takes 45 to 60 days.